Schritt-für-Schritt-Anleitung zur Einrichtung der Umgebung für io.net auf HiveOS-basierten Rechnern.

Step by step walkthrough for Running io.net in HiveOS
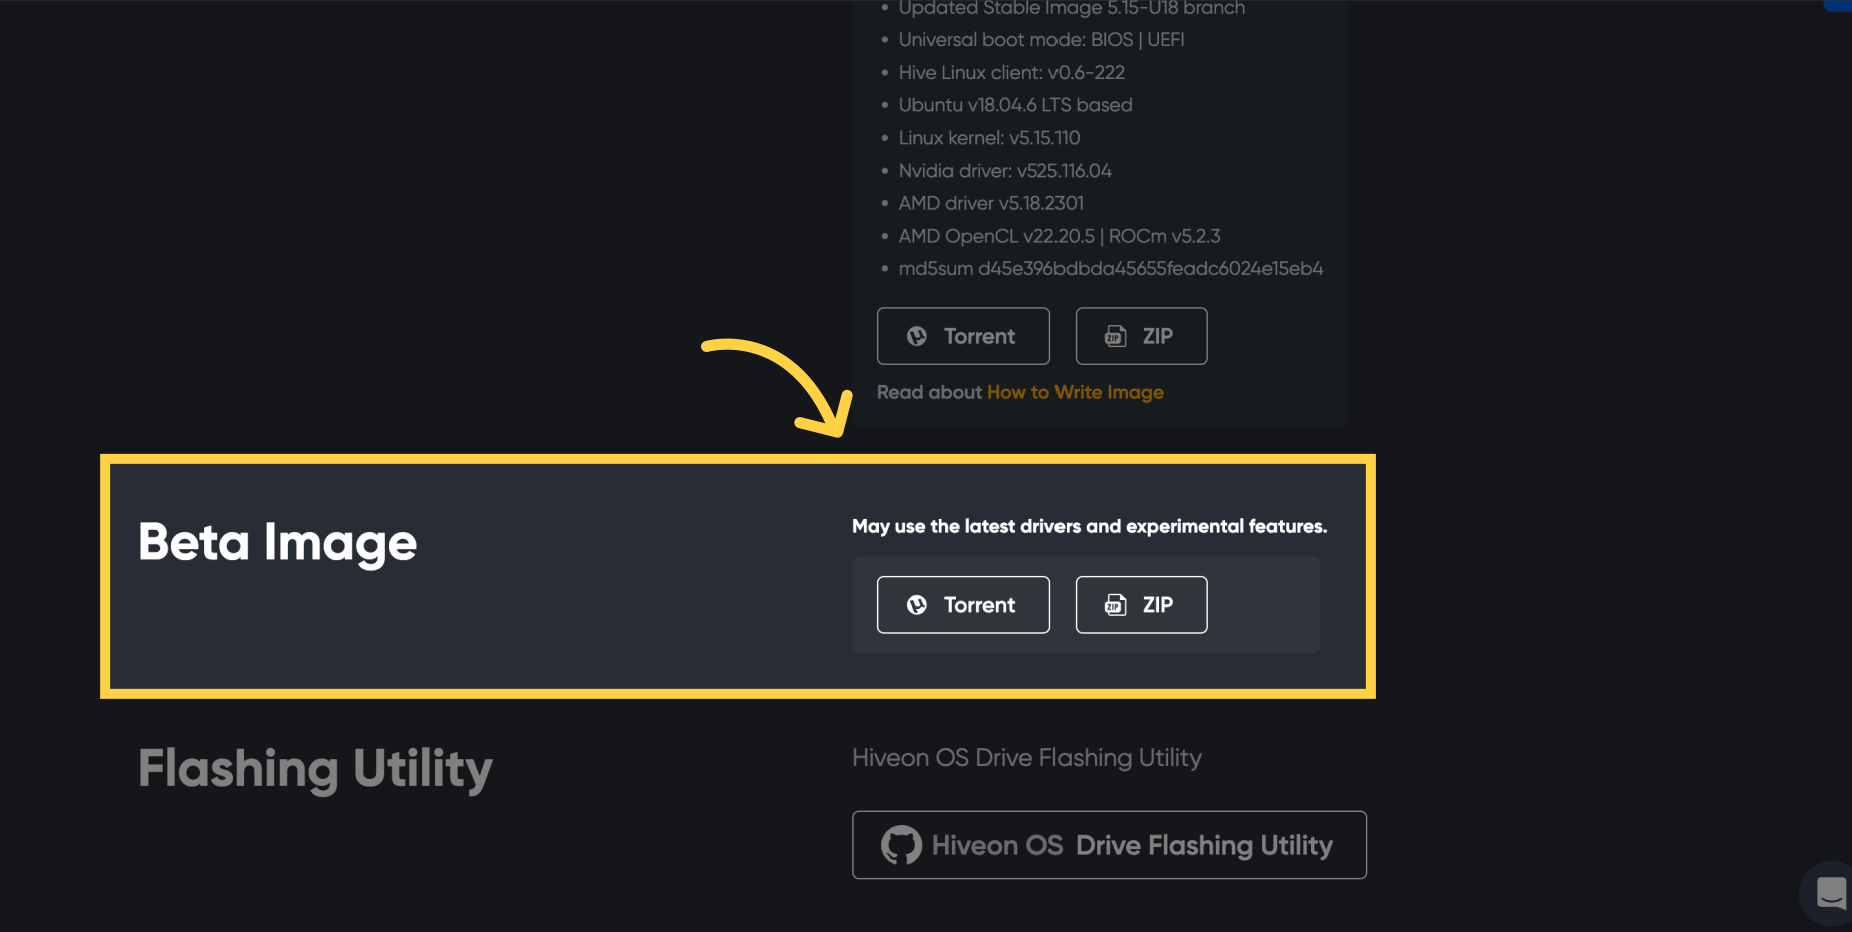
1/.Download HiveOS Beta version from this link: Download Beta version
2/.Burn the HiveOS using Etcher.io into the hard drive of the machine you want to rent

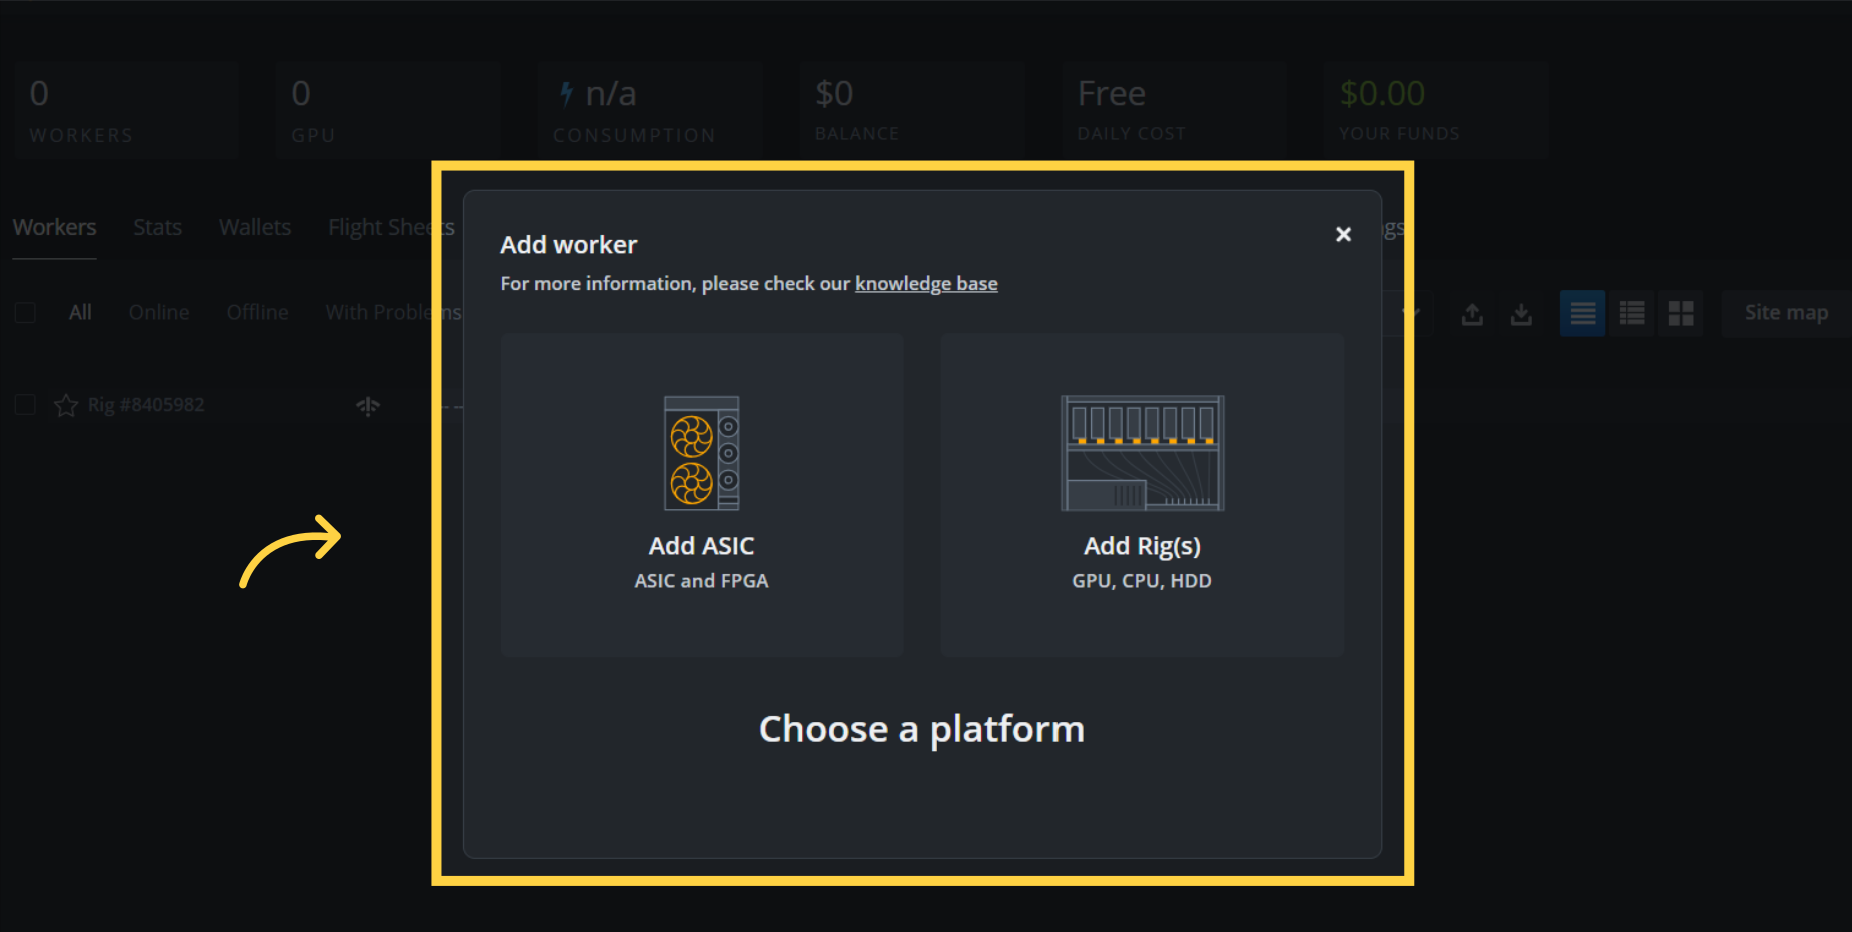
3/.Add a new worker in HiveOS
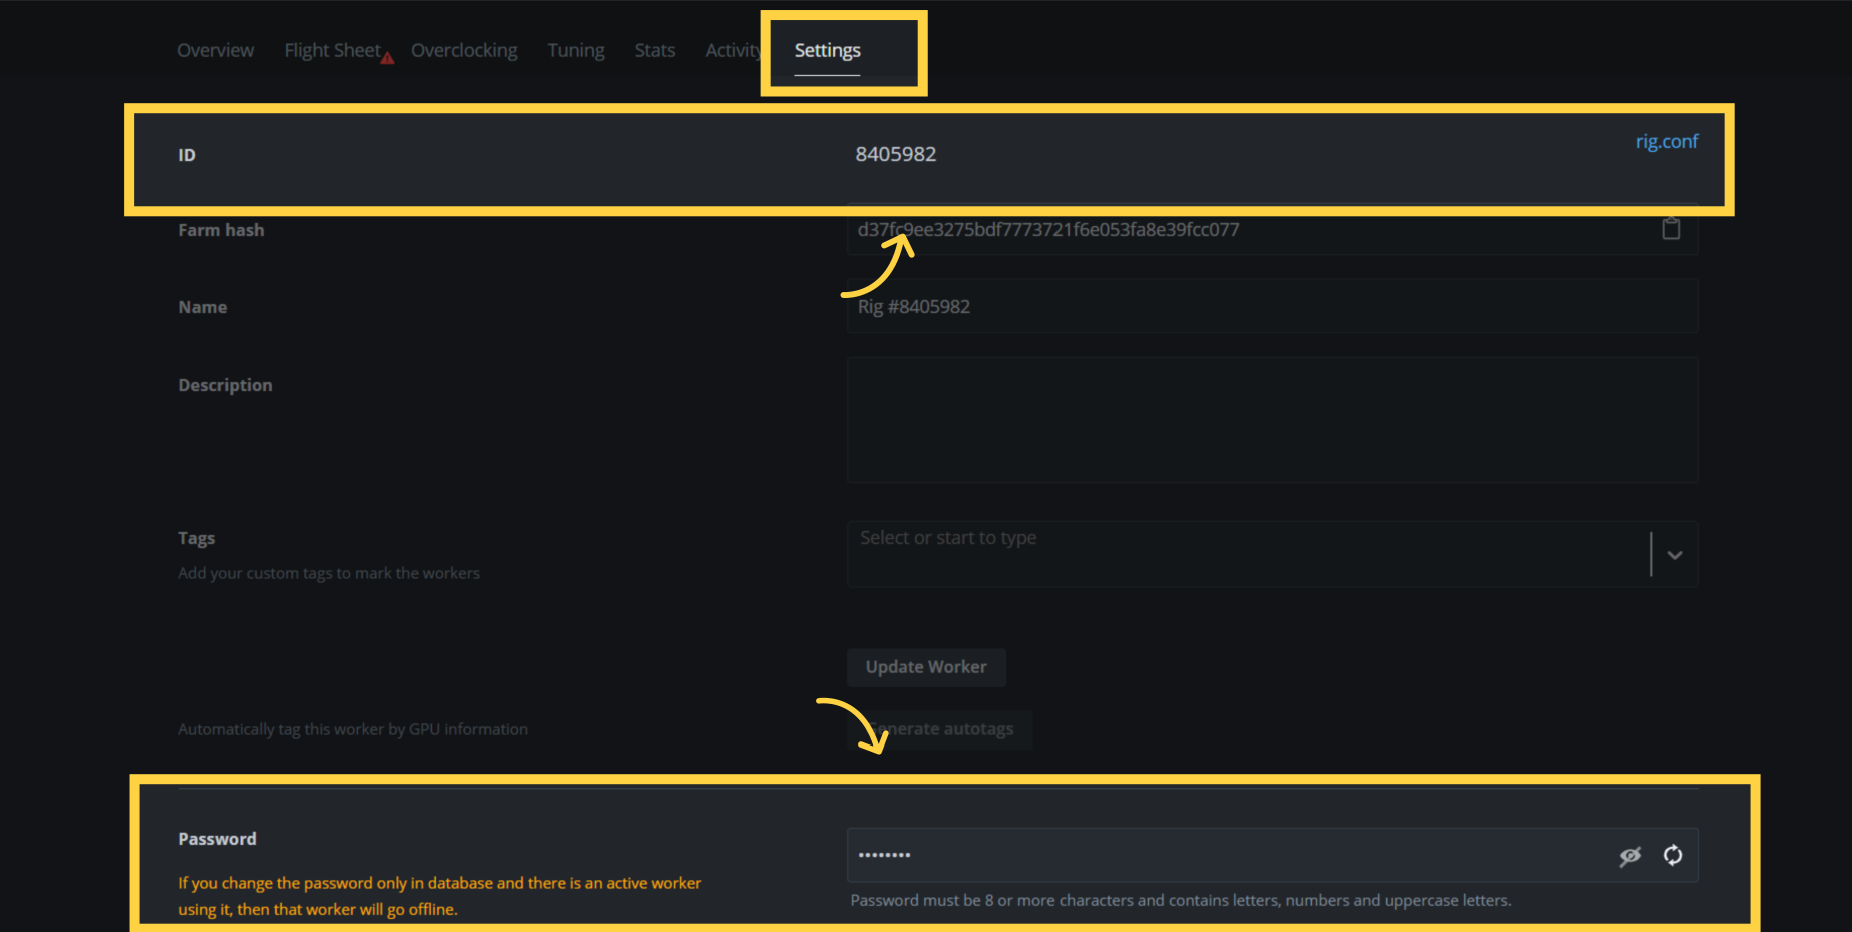
4/. In Settings, Enter the Rig ID and Password in the rig
Then enter the following commands:
1
sudo apt-get update -y
2
sudo apt-get install -y gnupg1
3
cd ~
4
wget <https://raw.githubusercontent.com/ionet-official/io-net-official-setup-script/main/ionet-setup.sh>